How to Draw a Tomato Step by Step
This step by step tutorial explains how to draw and shade a tomato to look realistic. It also includes pencil drawings as examples for each step.
A tomato is a fairly basic thing to draw. The shading can be a little tricky due to its fairly reflective surface but generally it’s not overly challenging making this a good tutorial for beginners.
Step 1 – Frame the Shape of The Tomato
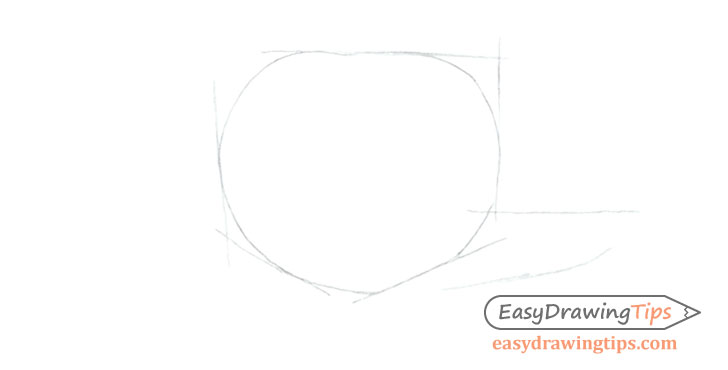
To begin the drawing make a light construction lines sketch to frame the basic shape of the tomato and to help estimate its height and width.
Step 2 – Make a Basic Line Drawing
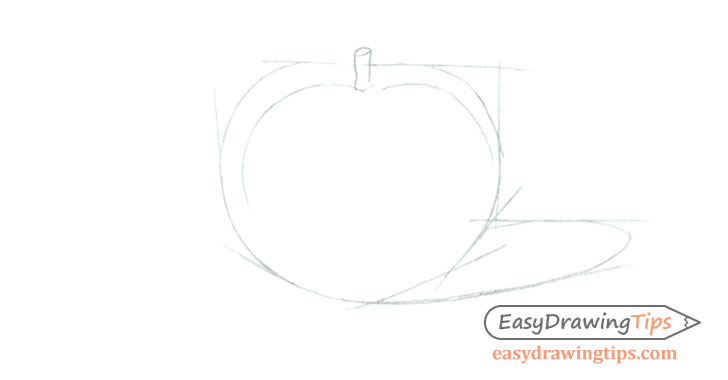
Inside the construction lines/frame add the basic curves of the tomato and indicate the position of the shadow that it casts.
The shadow will be cast mainly to the right and slightly towards the back.
Step 3 – Make a Clean Outline Drawing
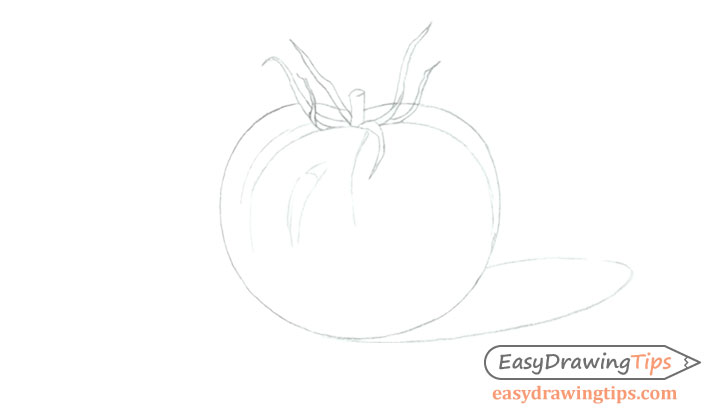
Clean up the construction lines and add the smaller details such as the vines. Also indicate the highlight areas as you will want to leave these white when shading.
Step 4 – Analyze the Light & Shadows
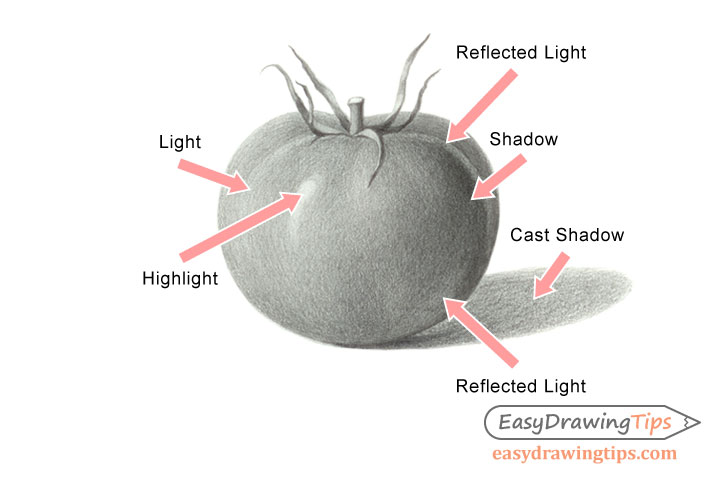
For this particular setup the light is coming from the upper left of the tomato and slightly to the front of it as well.
As already mentioned the shadow will be cast mainly to the right and slightly towards the back.
The tomato itself will be lighter on the left side and darker on the right side.
There will also be some light reflected from the surface which will create a lighter area on the bottom right side of the tomato.
Due to some curves in the shape of this particular tomato there will also be a lighter area on the end of the curve on the top right of the tomato.
The pedicel (part that attaches to the vine) and sepals (little leave shapes) will be lighter on any parts that face towards the light and darker on the ones that face away.
The pedicel is basically a tiny cylinder and the tomato itself is very similar to a sphere.
For a tutorial on shading these see:
How to Shade Basic 3D Shapes Tutorial
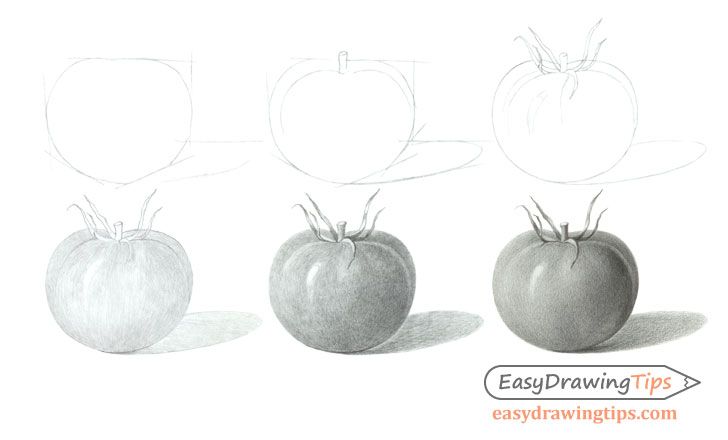
Step 5 – Begin Shading
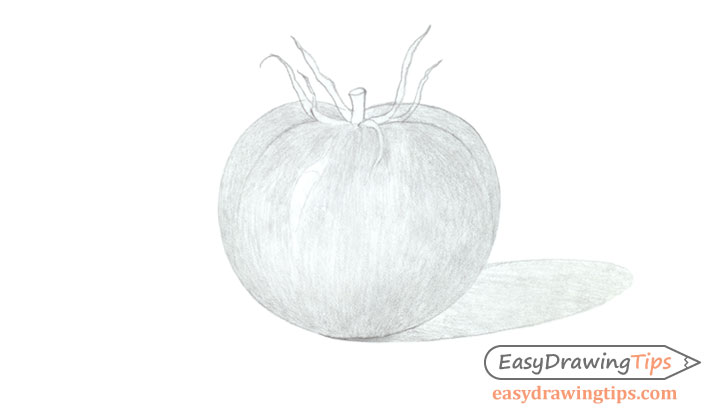
Begin shading the tomato by making strokes that curve around its shape. Leave the high are white.
For different types of shading strokes see:
Shading Techniques and Stroke Types Drawing Tutorial
Step 6 – Refine the Shading
Darken the “in shadow” areas by applying more and more overlapping strokes. Apply shading to the sepals and pedicel as described in step four. As this area is so tiny you can simply shade it with a solid fill without having to worry about strokes or their direction.
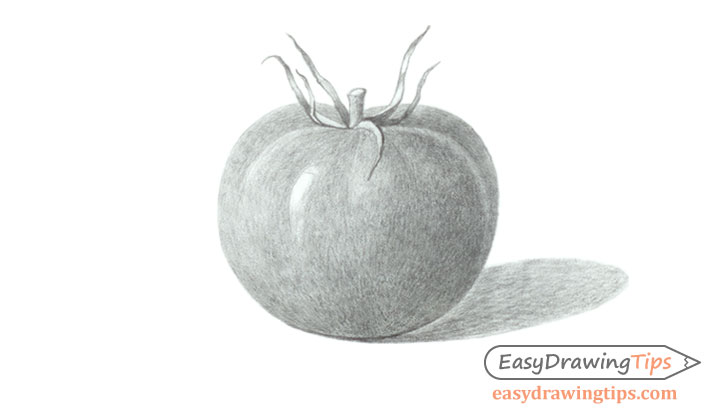
Step 7 – Finish the Drawing/Shading
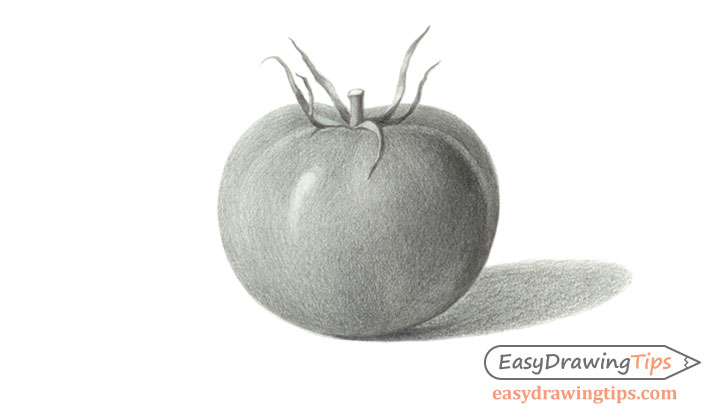
Keep on applying more and more strokes to the drawing until you have a fairly smooth blend for both the surface of the tomato and the shadow.
Once you are done you should have a finished shaded drawing of a tomato.
Conclusion
Tomatoes are a fairly easy vegetables to draw but can still present enough of a challenge for a beginner artists to make drawing them a good exercise.
For another similar tutorials see:
- How to Draw an Eggplant Step by Step
- How to Draw Garlic Step by Step Tutorial
- Egg Step by Step Basic Shading Tutorial